Wednesday, 13 March 2013

Waxing Crescent Moon with EOS 60D


Top: 2 days old. 4.0% visibility. 18:22 March 13, 2013
Bottom: 3 days old. 8.9% visibiliyy. 18:28 March 14, 2013

Magic Lantern Stack Focus on Canon EOS 60D

In Camera
1. Go to Live View Mode. Compose the image in the viewfinder. The camera is set to be in auto focus (AF) mode.
2. Press the Delete button to activate Magic Lantern (ML) menu. Go to Focus tab and enable the Follow Focus by setting it to Arrow. Exit the ML menu by pressing the Delete button. Follow Focus (FF) indicator will appear on the LCD Viewfinder.
3. Using the MultiController buttons, adjust the focus to point at one end of the object of of interest. Go to ML menu and Focus tab. At the Focus End Point menu, press Set button once to reset it to 0. Press Set button again and then use the MultiController buttons to set the focus point to the other end of the object. Once the end point has been set, press the Set button again.
4. Go to Stack focus menu, press Q button to open the submenu. Set the Step Size and Trigger mode. Press the Q button to exit the submenu.
5. Press the Trigger mode button as set in the previous mode. The images at different focus point as set will be captured automatically.

In Photoshop CS5
6. Launch the Bridge (Br).Browse to the folder with the images as captured in Step 5 and select all of the images. Go to Tools > Photoshop > Load Files into Photoshop Layers. All the images will be opened as Layers in Photoshop.
7. In Photoshop, select all the Layers. Go to  Edit > Auto-Align Layers. Choose Auto and press OK. Go to Edit > Auto-Blend Layers. Choose Stack Images and press OK.
8. Done. Crop and Save image as needed.


(Top: Regular image with focus point at the center of the object. Bottom : Stack focus final image.)

Friday, 22 February 2013

Boot Samsung Galaxy S2 into Recovery or Download Mode

Recovery Mode:
Switch off the phone. Hold Volume Up + Home + Power all at the same time until the recovery mode screen is reached. The phone might restart a few times before the recovery mode screen is reached.

Download mode:
Switch off the phone. Hold Volume Down + Power buttons at the same time until download screen is reached.

Sunday, 2 December 2012

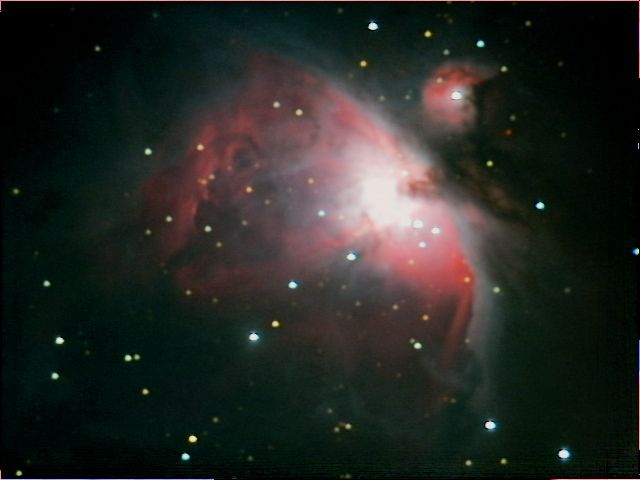
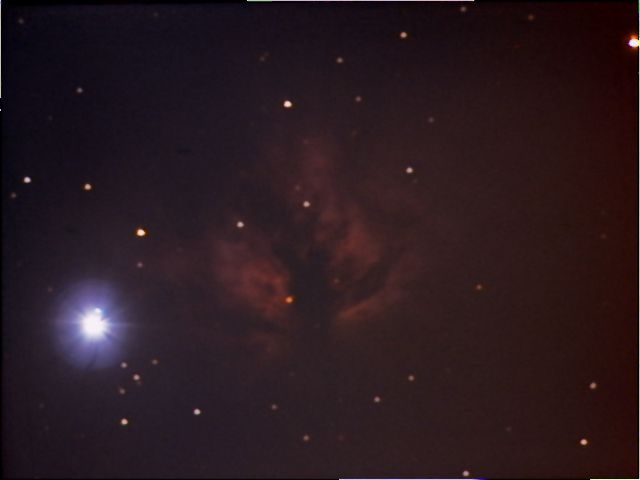
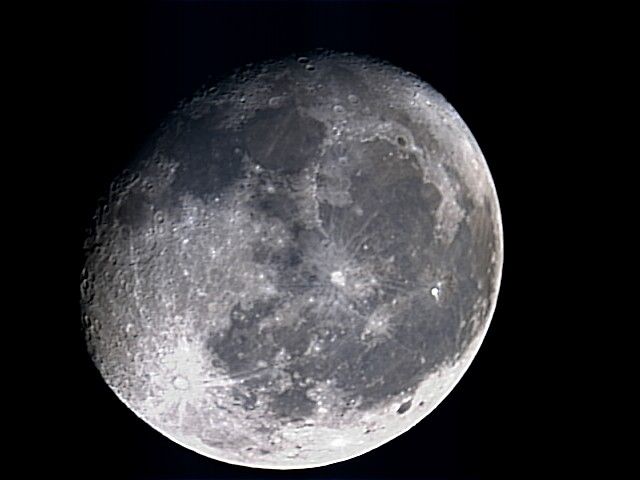
Celestron C6 Hyperstar SPC900NC Orion and Flame Nebulae

Orion Nebula M42 80x10s 13.3min 9xDark

Flame Nebula 135x10s 22.5min No Dark

Moon 747 Stacked Frames in Registax

Equipment lists:
Celestron C6 SGT/SCT
Nexstar SLT Mount
Hyperstar Lens FL290mm f1.9
Baader Neodymium Filter
SPC900NC LX/Amp off
Stacked with DSS

It was a very clear night but very cold as well. The moon was 90% illuminated as shown above. The hyperstar collimation was brought to the default position; screwed down all the way back. It seems to be rather acceptably collimated with the default. The moon looks good. The starts in the nebulae photos looks okay as well.

There seems to a problem with the dark frame calibration this time. A total of 29 dark frames from a group of 9 and 20 frames were taken but if all of them were used for calibration, vertical streak would appear on the images. So, only 9 dark frames were used for calibration on Orion Nebula while none for Flame Nebula. Some forum suggested that the streaky image is a result of mismatch dark frames, i.e different temperature between the light and dark frames. This is very much possible as light/dark frame are taken at different time, sometimes at 20-30 minutes apart. Some suggested not to use dark frame. Even without calibration using dark frame, there seems not that much noise after all except for one or two visible hot pixels. The frame capture sequence is as follow, Orion, Dark 9, Orion, Dark 20, Flame. 

Saturday, 1 December 2012

Taxi Fare : Hazel Farm, University of Surrey, Guildford Town, Train Station

Hazel Farm to Guildford Cathedral / University of Surrey : £8.40 day time
Guildford Train Station Main Entrance to Hazel Farm :  £10.40 after 11PM
Guildford Train Station the Other Entrance to Hazel Farm :  £12+ or  £11+ (can't remember exactly) after 11PM

The fare after 11PM is about 50% more than before 11PM as told by the taxi driver. Both taxi and private hire car are charging the same fare as the fare is set by the borough council.

Saturday, 24 November 2012

Telescope Arduino Stepper Motor Focuser Current Rating using 28BYJ-48 5V and 12V

The motor focuser is used to control the focusing knob of the Celestron C6 SCT. The controller board is Arduino Nano and the stepper motors is the 5V or 12V versions of 28BYJ48. It seems that the 12V version is using much less current as compared to the 5V version when supplied with 12V. It also should generate less heat.

Current Measurement
Arduino Nano and Driver Board : 40 mA

28BYJ48-5V supplied with 12V (inc arduino nano and driver board)
Max. speed (Delay@750µs) : 380 mA
Min. speed  (16000µs) : 510 mA

28BYJ48-12V supplied with 12V (inc arduino nano and driver board)
Max. speed (900µs) : 150 mA
Min speed (>10000µs) : 180 mA

The delay in microsecond as shown in the parentheses refers to the delay when changing the step of the stepper motor. The shorter the delay, the faster the motor will spin. From stall, the maximum stepping rate for the two motors are different and it is faster in the 5V version as shown above. Once the motor is running, the delay can be reduced slightly to achieve faster spinning. As for the 12V version, ~17RPM is achieved with 850µs delay and ~19RPM with 750µs delay.